-
- Picnic BlanketBeach TowelBeach BagBeach Chair CoverTable Cloth CoverBeach MatCamping MatLunch BagHammockCamping Chair
-
How to choose the right insulated lunch bag for your needs.
Views: 0 Author: Site Editor Publish Time: 2026-07-07 Origin: Site


Opening a lunch container to find lukewarm perishables, squished sandwiches, or leaked liquids after a long commute or a long day at an outdoor sports tournament is a common frustration. The core problem is the gap between aesthetic appeal and functional performance. Many products market themselves as thermal but fail basic temperature retention tests, leading to food safety risks, ruined meals, and premature replacement. You need a structured evaluation framework for selecting an insulated lunch bag based on thermal materials, structural integrity, capacity requirements, durability, and daily usage environments. This guide breaks down exactly what to look for, separating reliable gear from cheap promotional items so you can keep your food safe and intact.
Key Takeaways
- Insulation Density Dictates Performance: High-density EVA foam combined with reflective linings (like aluminum or PEVA) is non-negotiable for multi-hour temperature retention.
- Structure Prevents Damage: Choosing between a flexible, soft-sided bag and a rigid, hard-shell container is the difference between a pristine meal and a squished sandwich.
- Food Safety Requires Strategy: An insulated lunch bag alone cannot cool food; it requires at least two cold sources (per USDA guidelines) to maintain safe temperatures for perishables.
- Hardware Matters as Much as Fabric: Heat loss frequently occurs through cheap zippers and unsealed seams, making heavy-duty, double-pull zippers and leak-proof ultrasonic welds critical evaluation criteria.
- Form Must Follow Function: The choice between soft-sided, hard-shell, short, or tall configurations must align strictly with your specific container dimensions, commute style, and lifestyle demands.
The Science of Thermal Retention: How an Insulated Lunch Bag Works
Thermal resistance dictates how well consumer food storage performs in the real world. Insulation slows the transfer of heat between the interior compartment and the exterior environment. A high-quality bag creates a thermal barrier that prevents ambient warm air from penetrating the cold interior. It also stops interior heat from escaping into cold ambient air. The effectiveness of this barrier depends entirely on the materials used in the bag's construction. You cannot cheat physics; thin materials will always yield poor thermal resistance.
Core Insulation Materials Evaluated
The primary driver of temperature retention is the foam core. High-Density Polyurethane or EVA (Ethylene-Vinyl Acetate) foam drastically outperforms standard Polyethylene foam. Thickness, measured in millimeters, directly correlates to hours of temperature retention. A standard 3mm foam might hold temperatures for a couple of hours. Premium 8mm to 10mm high-density foam can maintain safe temperatures for a full workday.
Interior lining materials also play a massive role in overall performance. PEVA (Polyethylene vinyl acetate) offers excellent flexibility and leak resistance. This makes it ideal for carrying liquids or wet ice packs. Aluminum foil linings excel at radiant heat reflection, bouncing thermal energy back toward the food. Both materials are superior to bare plastic, but PEVA is generally preferred for its durability and ease of cleaning.
Insulation Material Typical Thickness Temperature Retention Best Application Standard Polyethylene 2mm - 4mm 2 - 4 Hours Short commutes, office environments High-Density EVA Foam 5mm - 8mm 6 - 8 Hours Outdoor work, school days, day trips Polyurethane (Closed-Cell) 10mm+ 12+ Hours Extreme heat, all-day tournaments, shift work The Vulnerability Points: Zippers and Seams
Even the thickest insulation is useless if ambient air freely infiltrates the compartment. Standard coil zippers feature tiny gaps between the teeth, allowing continuous heat exchange. This is a primary failure point for cheap promotional items. Heavy-duty, double-pull zippers with weather-resistant or waterproof sealing are necessary for maximum thermal efficiency and quick, convenient access.
Stitched seams create micro-perforations in the lining. Every needle hole is an escape route for cold air and a potential entry point for spilled liquids. Ultrasonic welding fuses the lining materials together without needles. This creates a completely leak-proof and airtight seal. It prevents cold air from escaping and stops spilled liquids from seeping into the foam core, which would otherwise cause permanent odor issues.
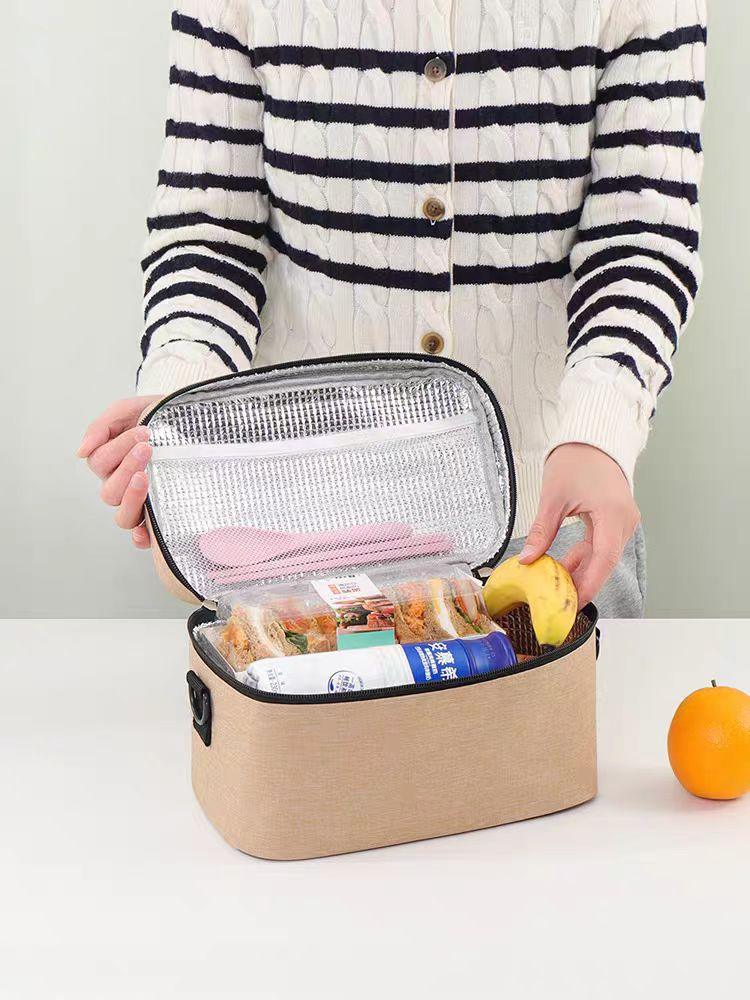
Defining Your Success Criteria: Matching the Bag to the User
Framing your purchasing decision around specific environmental demands ensures you get a product that actually works for your lifestyle. An office worker storing a meal in an air-conditioned building has vastly different requirements than an outdoor construction worker. You must evaluate your daily routine before looking at specific bag models.
Duration of Temperature Control Needed
Differentiate between short-term and extreme needs. A standard office commute usually requires 2 to 4 hours of temperature control before the bag is transferred to a communal refrigerator. In this scenario, a slimmer, less insulated bag is perfectly adequate. Shift workers, construction crews, or athletes at all-day outdoor tournaments require 8 to 12+ hours of retention. These extreme scenarios demand thick, high-density foam and strategic packing methods.
Hot vs. Cold Storage Requirements
Insulated bags maintain existing temperatures; they do not generate cold or heat. Packing strategies must differ based on the contents. Hot thermoses require pre-heating with boiling water before adding food. Chilled meal prep containers should be refrigerated overnight before packing. Mixing hot and cold items in a single-compartment bag without a thermal divider will rapidly neutralize both temperatures. This risks food safety and ruins the meal.
Key Evaluation Dimensions for Insulated Lunch Bags
Separating premium, reliable products from low-quality alternatives requires evaluating specific features. Construction quality, capacity, and exterior materials determine how long the bag will last and how well it will perform under daily stress.
Capacity, Interior Organization, and Silhouette
Sizing configurations dictate what you can carry. A tall design easily accommodates water bottles, tall thermoses, and stacked containers. Wide or short designs are ideal for flat containers, like bento boxes, preventing them from tipping and spilling during transit. You must measure your primary containers before selecting a silhouette.
Exterior mesh pockets provide utility for dry snacks or water bottles, keeping them separate from the temperature-controlled zone. Interior zippered pockets are essential for storing utensils and napkins, keeping them clean and away from condensation.
Structural Integrity: Hard-Shell vs. Soft-Sided Crush Resistance
The squished sandwich pain point is solved by structural integrity. A rigid inner plastic liner or hard-shell exterior is best for crush protection. This is vital when the bag is shoved into a crowded backpack or tossed into a truck cab. A flexible, soft-sided exterior is better for compact storage and packability. It allows the bag to collapse when empty, but it offers minimal protection for fragile food items.
Exterior Durability and Material Strength
Exterior shell materials must withstand daily abrasion. Compare Denier ratings when looking at Nylon and Polyester fabrics. A 600D fabric is standard and offers decent durability. A 1000D or higher rating provides superior puncture and tear resistance. Premium consumer brands often utilize TPU-coated water-resistant exteriors. This prevents the fabric from absorbing moisture when placed on wet surfaces, keeping the bag clean and lightweight.
Exterior Material Denier Rating Abrasion Resistance Water Resistance Standard Polyester 300D - 400D Low Minimal Heavy-Duty Nylon 600D - 800D High Moderate (requires DWR coating) TPU-Coated Fabric 1000D+ Extreme Fully Waterproof Portability and Ergonomics
Assess carrying options based on how far you walk. Padded top handles are sufficient for short trips from the car to the desk. Adjustable shoulder straps free up your hands, which is crucial for public transit commuters. Modular clips allow you to attach the bag to backpacks or sports gear bags. Weight distribution is critical when the bag is fully loaded with heavy glass containers and thick ice packs. A poorly designed strap will dig into your shoulder and cause discomfort.
Ease of Cleaning and Maintenance
Leak-proof, seamless interior linings are critical. Ultrasonically welded seams prevent liquid from seeping into the foam insulation. Once organic matter penetrates the foam, it is impossible to clean and will eventually harbor bacteria. Wipe-down maintenance is vastly superior to machine washing. Machine washing often degrades thermal foam, warps rigid liners, and damages waterproof coatings.
Food Safety, Compliance Standards, and Performance Verification
The primary function of any food storage container is keeping the contents safe to eat. Anchoring your evaluation in authoritative health standards ensures you are not taking unnecessary risks with perishable items.
USDA Guidelines for Perishable Foods
The USDA explicitly warns about the Danger Zone, which spans from 40°F to 140°F. Within this temperature range, bacteria multiply rapidly, doubling in number in as little as 20 minutes. Perishable foods left in uninsulated environments quickly reach ambient temperatures, making them unsafe to consume after just two hours. Your bag must keep internal temperatures below 40°F until you are ready to eat.
Effective Use of Cold Sources
To combat the Danger Zone, you must use cold sources effectively. A bag alone cannot cool food. The USDA recommends using at least two cold sources, such as solid gel packs or frozen water bottles. Place these strategically to create a consistent cold envelope around the perishable items.
- Place one large, flat ice pack flat against the bottom of the bag.
- Load your heaviest, most dense food containers directly on top of the bottom ice pack.
- Add lighter items, such as fruits or snacks, on top of the heavy containers.
- Place a second ice pack directly on top of the food stack, as cold air naturally sinks.
- Zip the bag closed immediately to trap the cold air inside.
The Home Ice-Retention Test: Verifying Performance Before Use
Before trusting a new bag with perishable food on a hot day, perform a simple DIY verification method. This ice-cube test provides a clear baseline for the bag’s true insulation performance, allowing you to adjust your packing strategy accordingly.
- Fill the empty bag halfway with standard ice cubes from your freezer.
- Zip the bag completely shut, ensuring all zippers are fully seated.
- Leave the bag in a room-temperature environment, away from direct sunlight.
- Open the bag after 4 hours to check the ice melt ratio.
- Check again at 8 hours and 12 hours to determine the maximum retention limit.
Common Trade-Offs to Consider Before Buying
No single product excels in every category. Understanding the inherent trade-offs helps you select the right tool for your specific routine.
Maximum Capacity vs. Commuter Portability
Carrying a high-capacity, rigid bag on public transit introduces significant friction. It takes up space on crowded trains and bumps into other passengers. A collapsible, soft-sided bag holds less food but stores easily in a messenger bag when empty. You must weigh the need for large meals against the reality of your daily commute.
Heavy-Duty Insulation vs. Usable Interior Space
Thicker insulation inherently reduces the internal volume of the bag. If you need 12-hour temperature retention, the foam will be thick, requiring a much larger external footprint to hold the same amount of food as a thinly insulated bag. Do not assume exterior dimensions equal interior capacity. Always check the internal measurements before purchasing.
Implementation Risks: Why Insulated Bags Fail
Even premium products fail when used incorrectly. Understanding common failure points extends the lifespan of your gear and prevents mid-commute disasters.
Zipper Blowouts and Seam Tears
Overstuffing is the primary cause of hardware failure. Forcing a zipper closed over containers that are too large puts immense stress on the zipper teeth and the surrounding fabric seams. Measure your primary lunch containers before purchase to ensure a minimum 1-inch clearance on all sides. This clearance also allows room for necessary ice packs without straining the hardware.
Mold and Odor Retention
Trapped moisture leads to mold, particularly in micro-abrasions of the lining. Mitigation protocols are simple but require consistency. Perform immediate post-use wipe downs with a damp cloth. Leave the bag unzipped overnight to air dry completely. Avoid harsh chemical cleaners, particularly bleach, as they degrade PEVA linings and cause them to crack over time.
Conclusion
- Measure your most frequently used food containers to determine the exact internal dimensions required for your new bag.
- Calculate your maximum commute or outdoor activity time to establish your baseline thermal retention needs.
- Verify that the bag features high-density EVA foam and ultrasonically welded seams before making a purchase.
- Invest in high-quality, slim ice packs to pair with your new bag to ensure you meet food safety guidelines immediately.
FAQ
Q: How long does an insulated lunch bag keep food cold?
A: Performance varies based on insulation thickness and the use of ice packs. Standard bags typically maintain safe temperatures for 4 to 8 hours. Premium high-performance models with thick, high-density foam can keep food cold for up to 12 hours or more when packed correctly with multiple cold sources.
Q: Can I put hot food in an insulated lunch bag?
A: Yes, thermal insulation retains heat just as effectively as it retains cold. However, you should not mix hot and cold items in the same compartment. Use a dedicated bag for hot items and ensure your containers are tightly sealed to prevent steam from damaging the interior lining.
Q: Are hard-shell liners better than soft-sided bags?
A: Hard-shell liners are superior for crush resistance, protecting fragile items like sandwiches and soft fruits. Soft-sided bags are better for tight storage and portability, as they can collapse when empty. Choose based on whether protection or packability is your higher priority.
Q: How do I clean a PEVA-lined bag?
A: Wipe the interior with a damp cloth and mild dish soap immediately after use. Avoid harsh chemicals, abrasive sponges, or machine washing, as these will degrade the PEVA material and compromise the waterproof seal. Always leave the bag open to air dry completely.
Q: Why is my bag sweating on the outside?
A: Exterior condensation, or sweating, occurs when the insulation is too thin to prevent the cold interior temperature from meeting the warm, humid exterior air. This is common in low-quality bags. Upgrading to a bag with thicker, high-density foam will eliminate this issue.